 Daniel
 deutsche Version anzeigen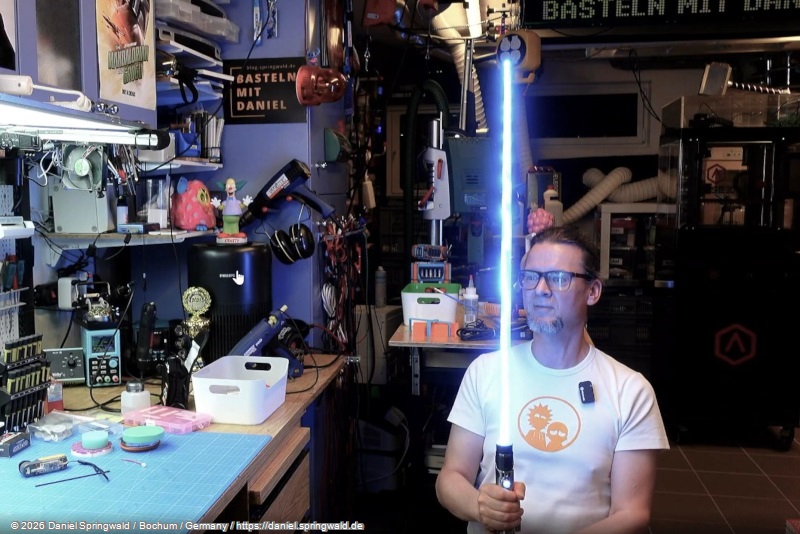
For 2 years I have been tinkering with building an extendable lightsaber.
First attempts on the basis of the Disney patent already worked great, as you can see in the following video. However, due to the principle, the extension is very slow. In addition, the necessary mechanics inevitably lead to a somewhat clunky grip, even if you still try to miniaturize it strongly.
After I wasn't really happy with the first version, I was told by a friend that Herotech in Singapore are developing a lightsaber on a completely different technical principle and sharing their blueprints, knowledge and support for a small monthly fee.
The basis for this construction is an item from the wizard's accessories: The walking stick that appears. Technically, this is a flat, rolled spring that wants to unfold into a long rod. Normally, this is made of steel, but a supplier probably also makes it from transparent plastic. In these "magicians cane" as the heart of the Herotech variant, an LED strip is used to illuminate the rod from the inside. At the same time, it is also used to retract the walking stick by rolling it up. So that you can see the LED strip from all sides, the entire technical inner workings rotate inside the lightsaber.
The walking stick that appears, which serves as the heart of the extendable lightsaber - already equipped with the LED tape roller at the bottom.
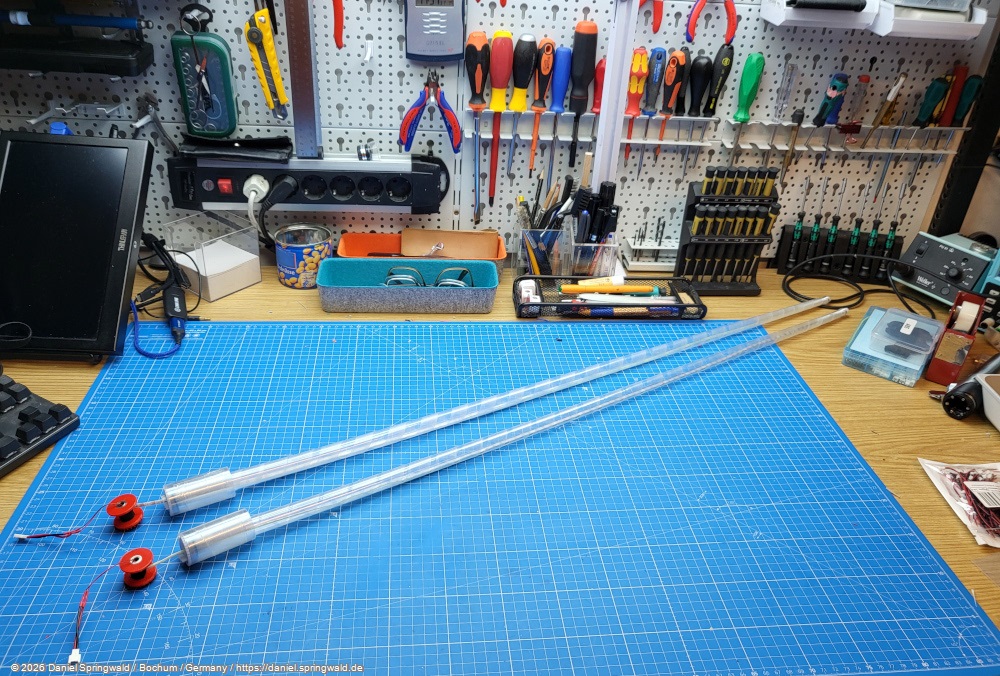
The LED role up close
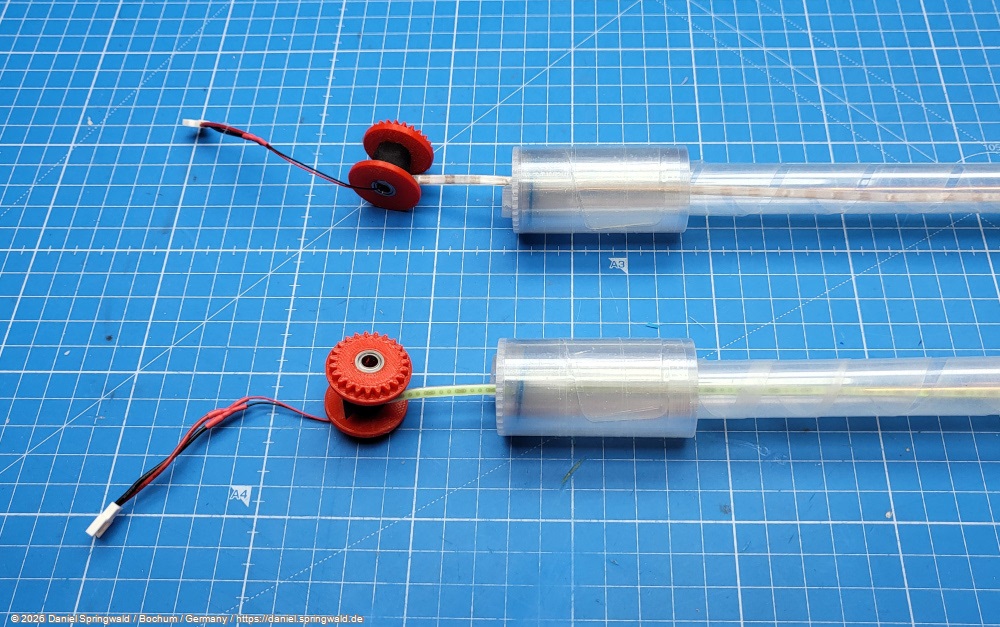
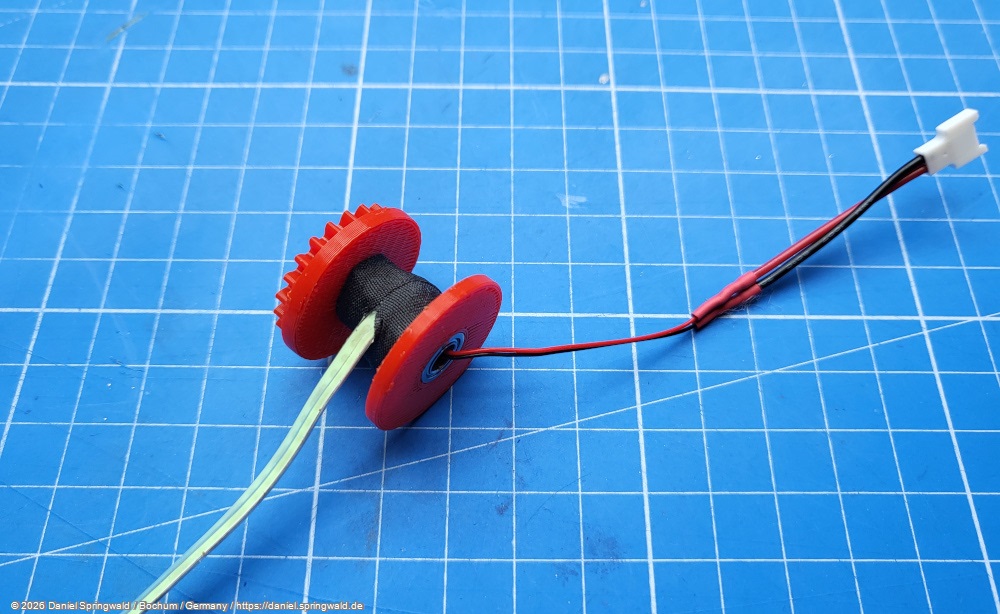
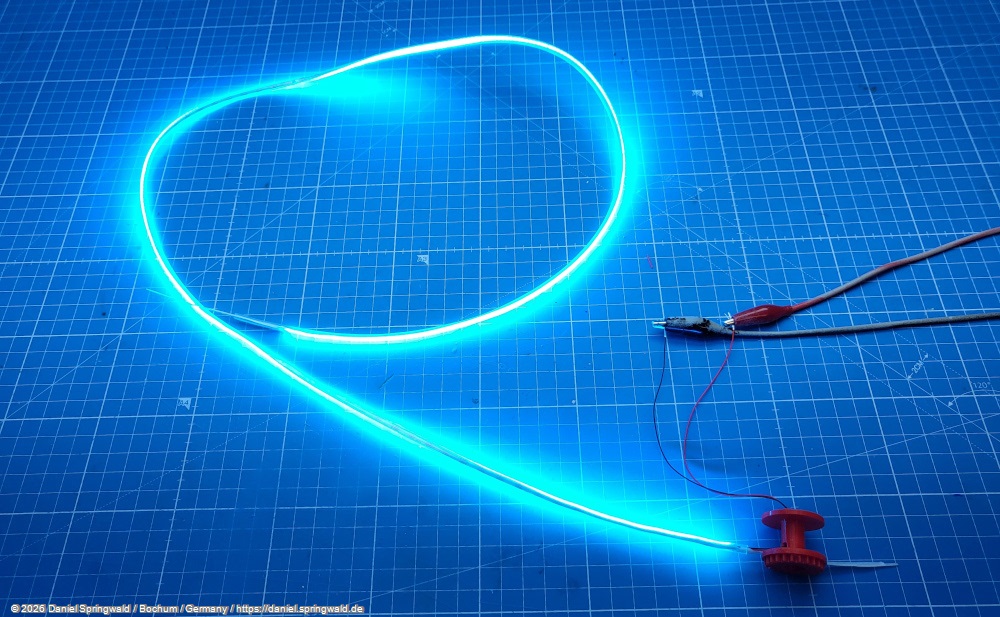
Test of the LED tape that illuminates the appearing walking stick from the inside
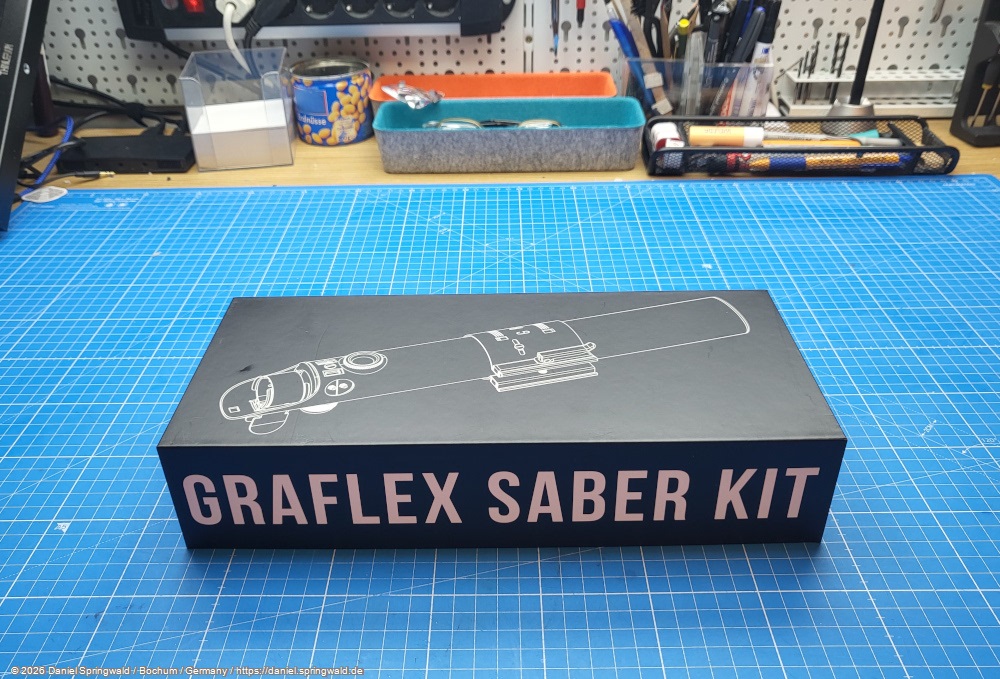
The whole thing is used in a Graflex lightsaber grip, which is modified by Herotech to accommodate the mechanics. The Graflex grips are the original grips from the Star Wars movies and are originally flash holders for old cameras. Normally, they are powered by mono-cell batteries that are housed in a compartment in the handle.
Purchased replica of a Graflex lightsaber hilt:
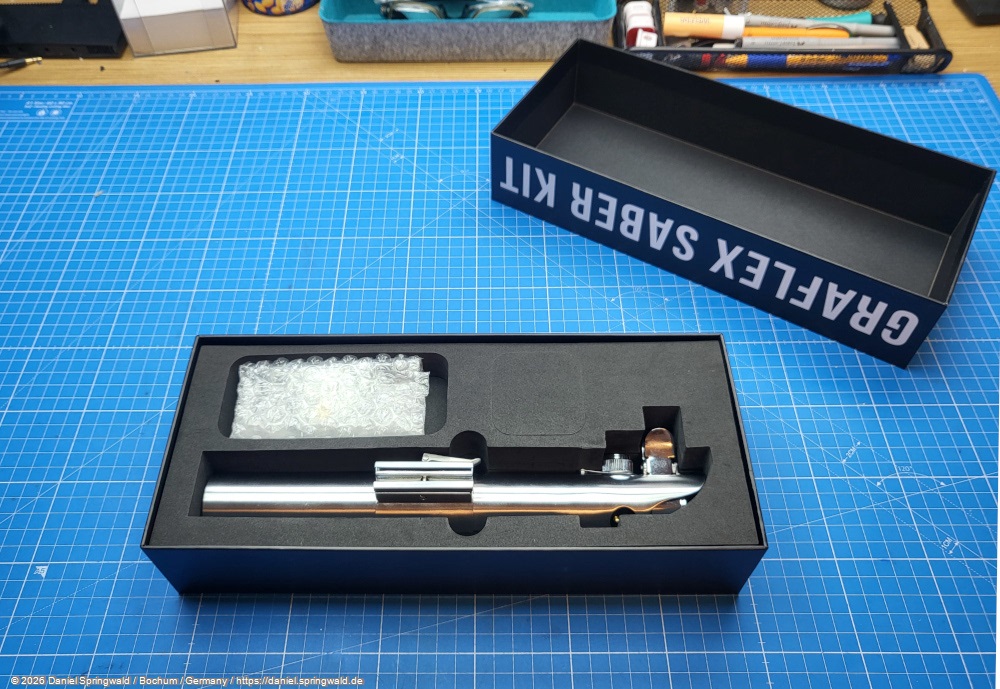
The people at Herotech have done an incredible job from my point of view: Designing the whole precision mechanics so that it fits into an original Graflex lightsaber grip is admirable. If you look at the progress over the months, you can see how many creative ideas and solutions have been developed and tried out there.
The new interior inserted into the open Graflex lightsaber handle:
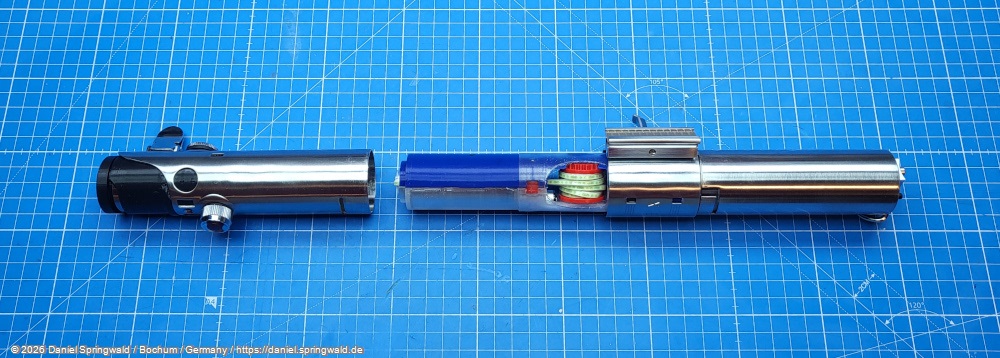
The whole thing inspired me so much that I got in on version 3 and rebuilt the Herotech lightsaber. One of my first successful tests is captured on videos:
Here you can see the inner workings of the extendable lightsaber. You can see the roll with the LED tape well. On the left, the tip of the walking stick that appears is still sticking out. Electronics and batteries are located in the right area:
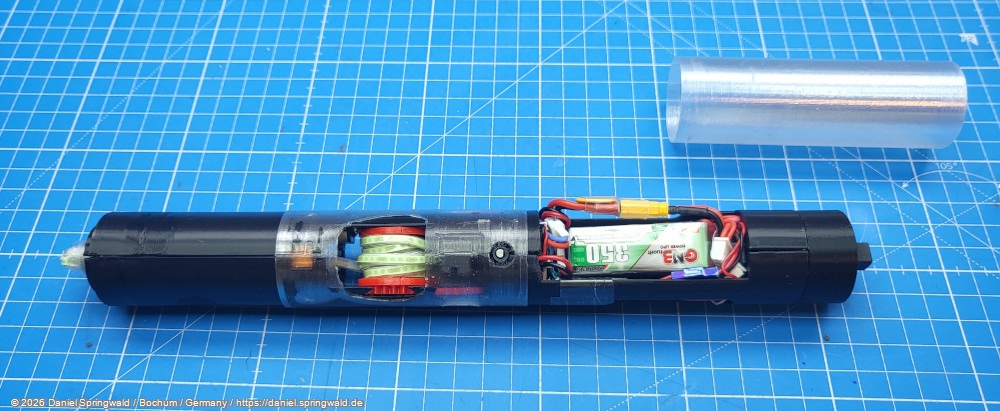
I won't go into the basic construction in detail here, but there is a nice, detailed video from Herotech.
I'm going to focus on the changes I've made myself. I am in contact with Herotech and give my ideas and insights back to the community. Maybe they are helpful 😉.
My Adjustments
Note: The adjustments shown here are based on version 4 of Herotech. I can't rule out that they may have already been adopted in future Herotech versions or are no longer compatible with them.
Use of Connectors
In contrast to the Herotech version, I have provided all connected components with connectors, so that I can easily remove the electronics if necessary. This costs some of the already very limited space in the handle, but it makes maintenance and replacement of components easier.
The complete electronics of my lightsaber version including all components:
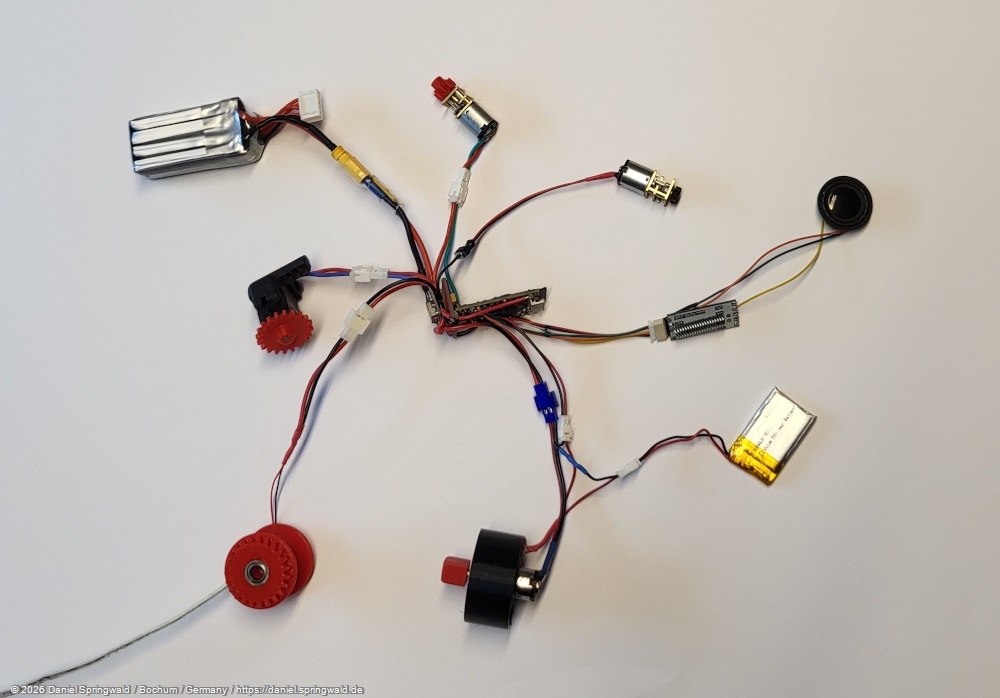
The pure electronics with all connectors:
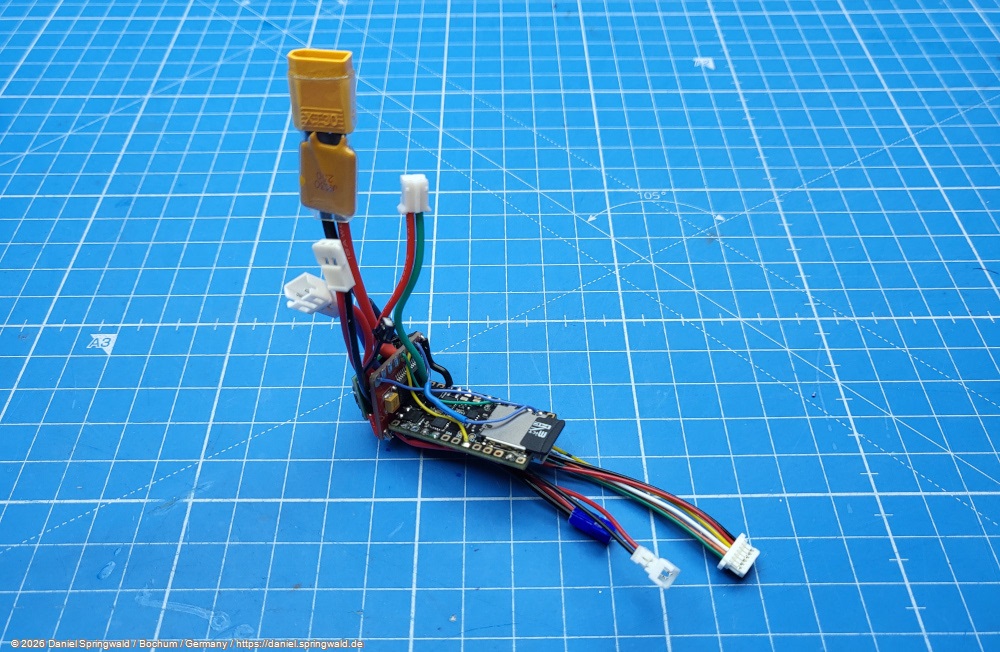
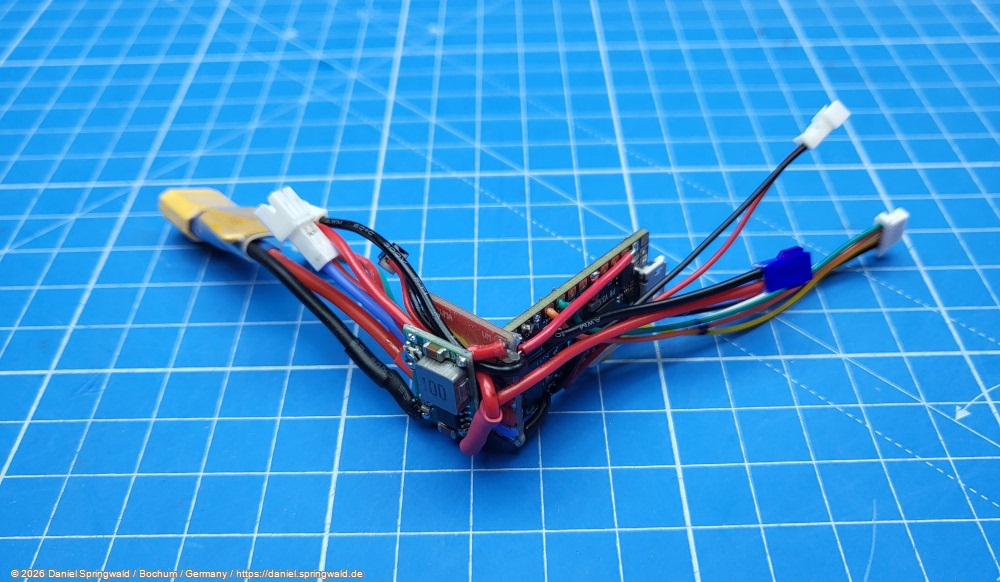
More stable connection of the chassis spin motor to the Graflex Hilt
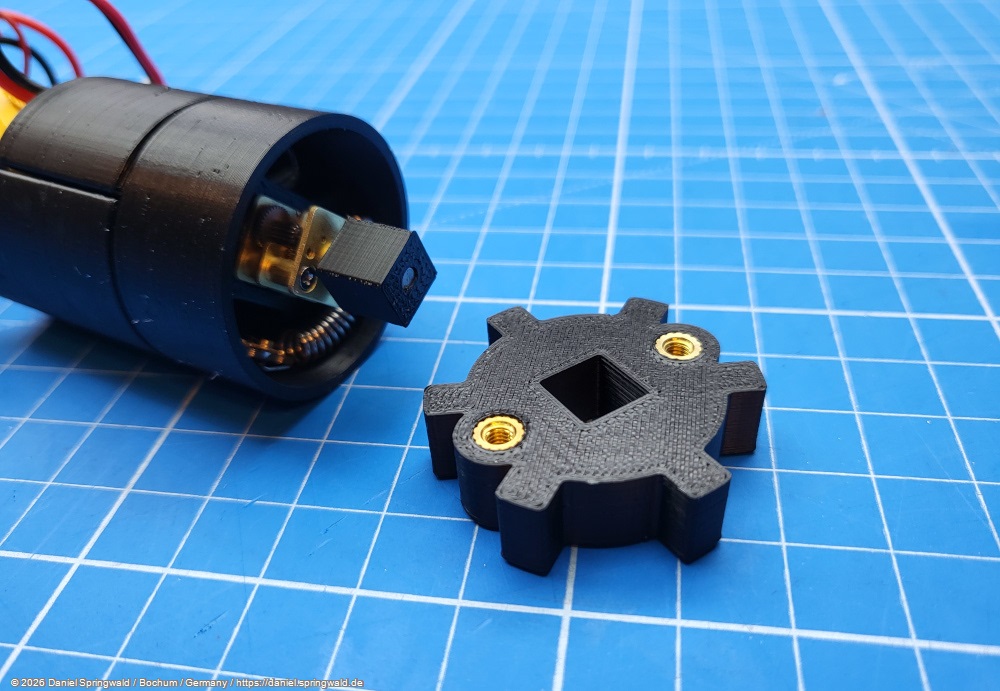
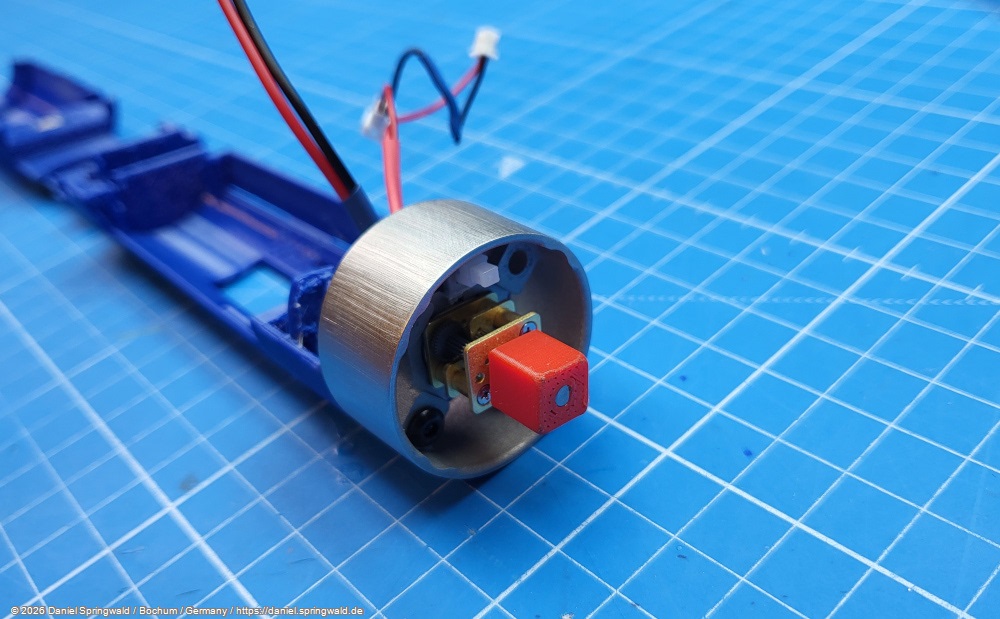
In the original design, the chassis spin motor is plugged directly into a 3D-printed insert in the Graflex Hilt via its 3mm axle. On the one hand, it has to be so loose that it can be easily inserted, but on the other hand, it also has to be so firm that the motor is not pushed out of the handle when turning. This is a very difficult compromise that did not work reliably for me. Strictly speaking, the 3D printed axle bracket is worn out over time, so that the axle is then spun.
Therefore, I provided the transition from axle to Graflex Hilt with a 3D printed adapter measuring 5x5mm:
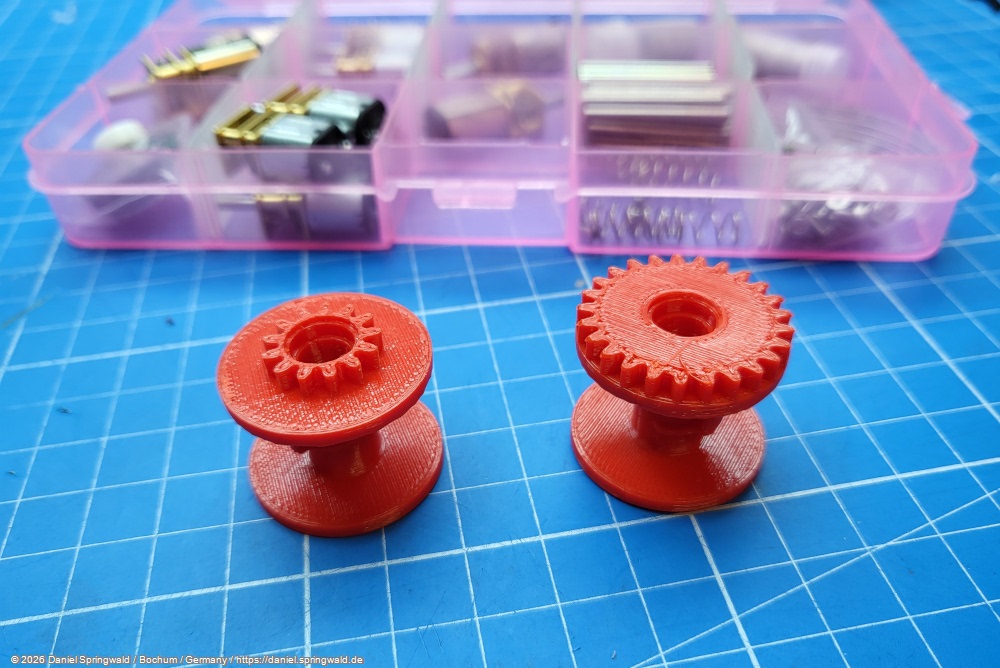
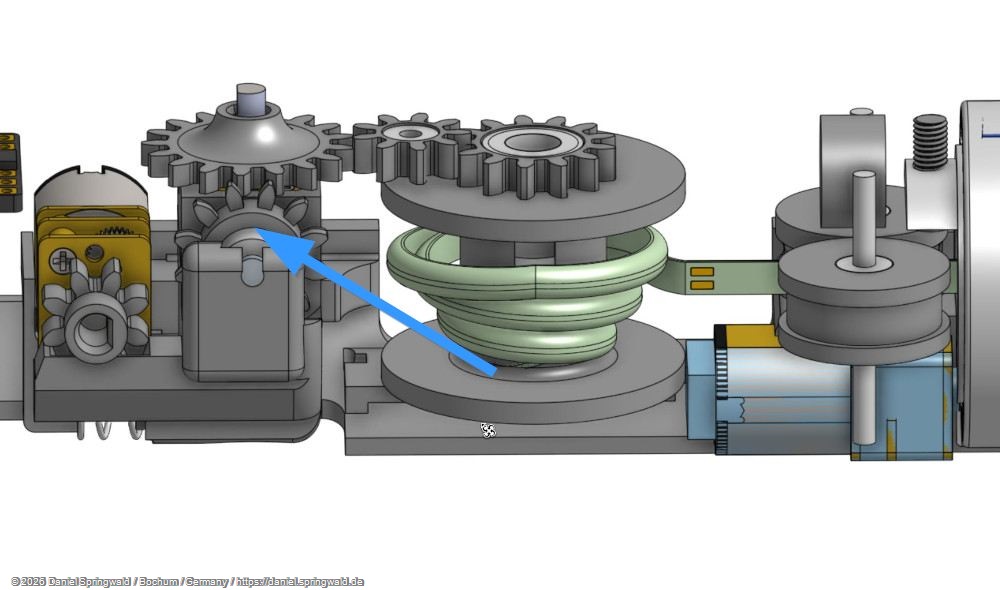
Re-design of the gears
The power transmission of the retraction motor to the roller with the LED strip is done in the original design via three gears.
The small gear wheel in the middle connects the gears of the retraction motor and the LED roller. Because this tiny gear still has to accommodate a ball bearing, it has very thin walls. At the same time, however, it has to rotate very quickly when unrolling and process large forces when rolling up. The gear is constantly broken for me - despite different 3D printing variants that I have tried (FDM with PLA, ABS, PETG and resin printing with Tough ABS-Like). Unfortunately, I couldn't try a version made of metal, because the one delivered was not made dimensionally accurate enough.
The original three gears with the small gear wheel in the middle
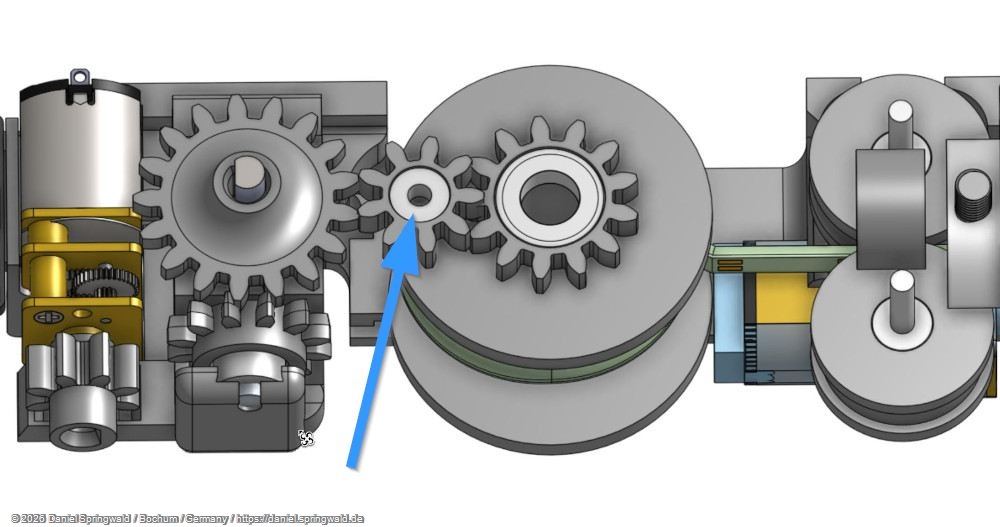
In practice, this gear was the main reason why the lightsaber suddenly broke down at events. Other problems were much rarer. In my variant, I have therefore enlarged both outer gears to such an extent that the middle, small gear wheel is superfluous.
On/off switch
Since the entire inner workings of the lightsaber rotate in the handle, it is difficult to route cables for switches or buttons to the outside. In the Herotech variant, the electronics of the lightsaber are permanently switched on and the professional board is only in sleep mode. To activate the lightsaber, a magnet is attached on the outside and a reed contact on the inside. If the magnet is still pushed, the contact is triggered. This was a bit too unreliable for me, especially since the reed contact also rotates and the distance to the magnet constantly varies due to the rotation.
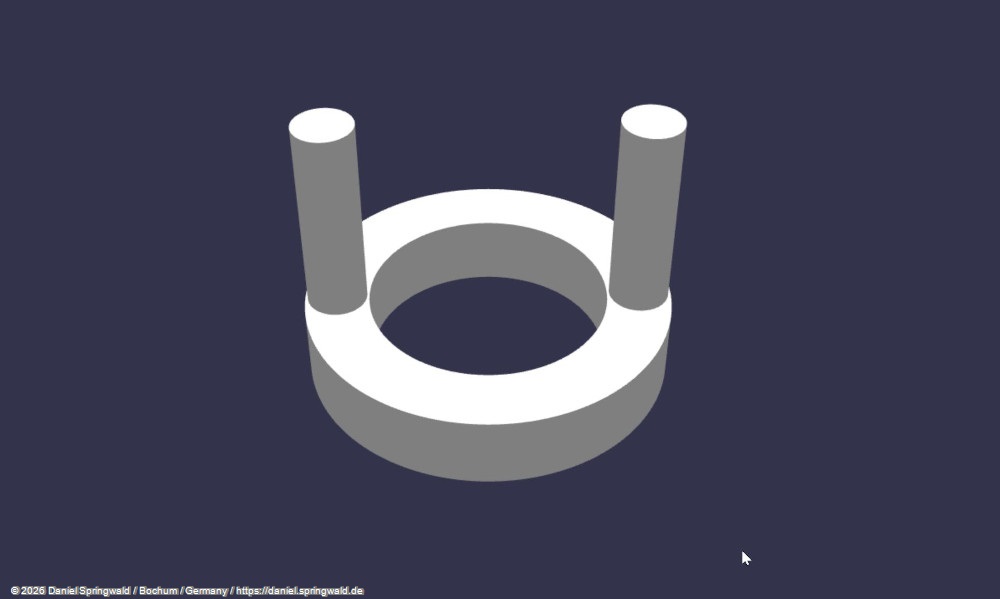
Therefore, I have installed a switch at the bottom, which can be operated from the outside and disconnects the Proffieboard from the 3.7 volt battery. To ensure that this also works when turning, regardless of the position of the switch, the pressure is transmitted via a ring. To prevent this ring from constantly resting on the switch and dragging when turning, it is pulled back again by magnet.
At the top above the chassis axle you can see the small white button
The ring used to actuate the switch. The two cylinders protrude from the bottom of the handle and push the ring in.
The new bottom of the lightsaber with the hole for the axle of the chassis spin motor and the switch

Self-resetting fuse for the main battery
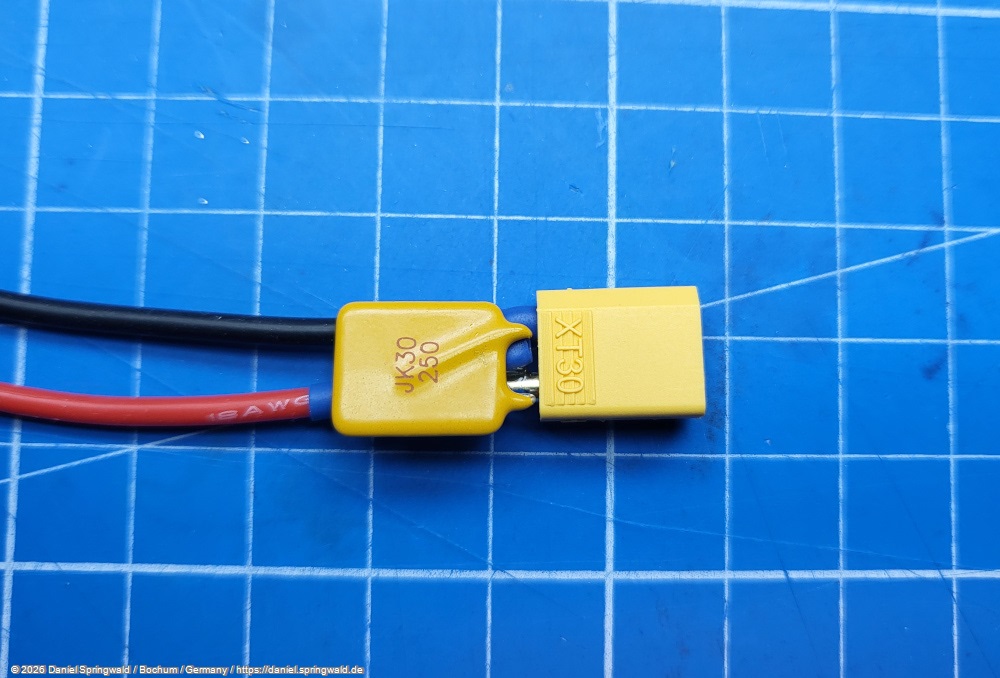
It has sometimes happened to me that there were short circuits in the lightsaber, for example when the LED strip was damaged. Since the main battery can deliver quite a few amps, this is not without danger and in these cases it also smoked because cables are completely scorched. Therefore, I installed a self-resetting fuse in the power supply of the main battery. This fuse breaks the circuit if the current becomes too high. After a short cooling phase, it switches on again.
Self-resetting 2.5 amp fuse for the main battery
Backstop removed
In the original design of Herotech, a backstop is built-in, which prevents the LED strip from unrolling on its own and exceeding the holding force of the gear reduction of the retraction motor. But I've never had this effect before, which is why I removed the backstop. This has the advantage that the lightsaber can also be extended again by reversing the current direction of the retraction motor, instead of suddenly shooting out via the clutch.
The backstop of the retraction motor
More stable LED tape
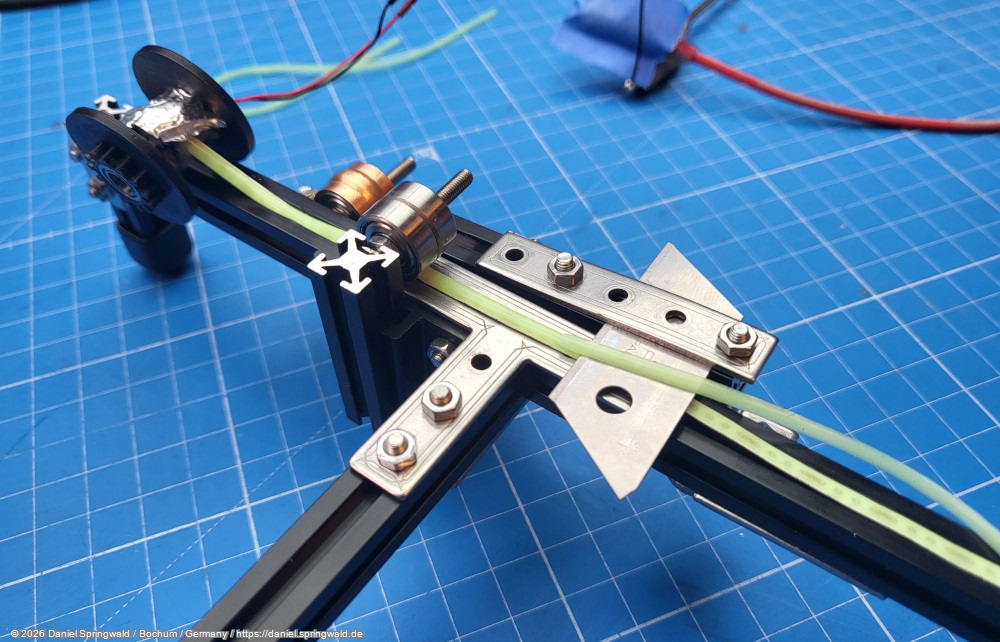
The LED tape is quite sensitive and would normally tear when rolled up. Herotech therefore sticks a sturdy adhesive tape to the LED tape from behind. However, this dissolved in my case over time due to the silicone oil used to glide the LED strip. I therefore inserted the LED tape into a 3mm thick shrink tube , which stabilizes the LED tape and at the same time reduces friction when rolling up. Unfortunately, the whole thing became so thick that it no longer fit on the roll. To fix this, I built a small device with which I can remove a small layer of the silicone coating from the LED tape. After that, the LED strip fits back onto the roll.
Planing off the silicone coating of the LED tape so that it fits back onto the roll
Radio remote control
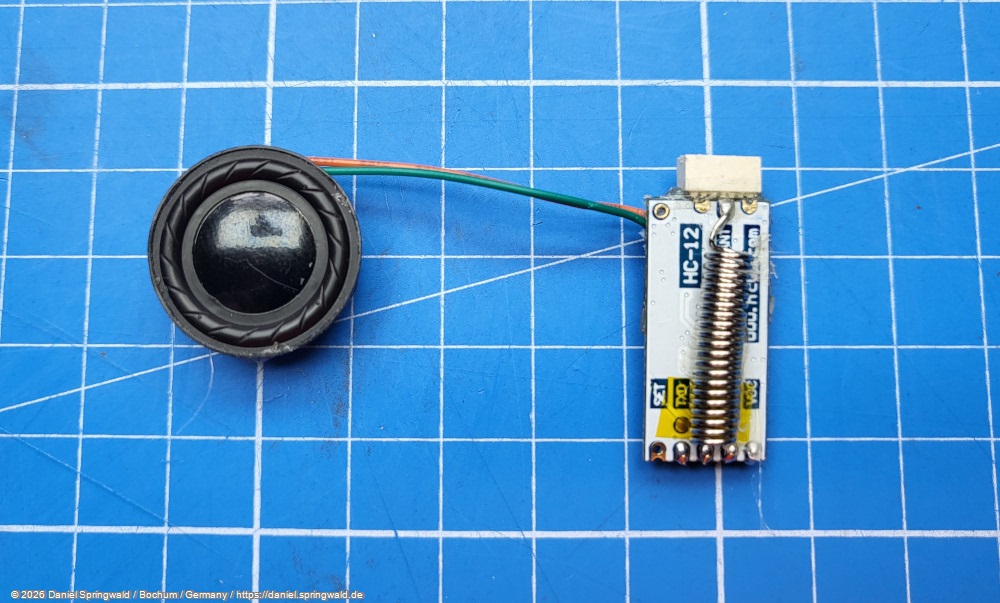
I have added a 433 MHz radio module to the electronics, which makes it possible to control the lightsaber remotely. Unfortunately, due to the thick steel tube of the lightsaber, the range is severely limited and only works quite unreliably when the lightsaber is closed. However, it is useful for testing the lightsaber functions when the mechanics are outside the Graflex grip.
The 433 MHz radio module that allows you to control the lightsaber remotely
Via the radio remote control you can test the LED strip, retract and extend the lightsaber, adjust the speed and reverse the direction. In addition, you can activate the countdown when the lightsaber is switched on, so that it does not extend automatically after it is switched on.
In this video you can see the different test modes that I have built into the software:
Software
In particular, for the radio remote control, the countdown when switching on, the test modes for the different motor directions, I have completely rewritten the software for the professional board. As soon as the project is more or less completed for me, I plan to clean up the software a bit and publish it on GitHub.