 Daniel
 deutsche Version anzeigen
This is an article from the Animatronic WorkBench Documentation
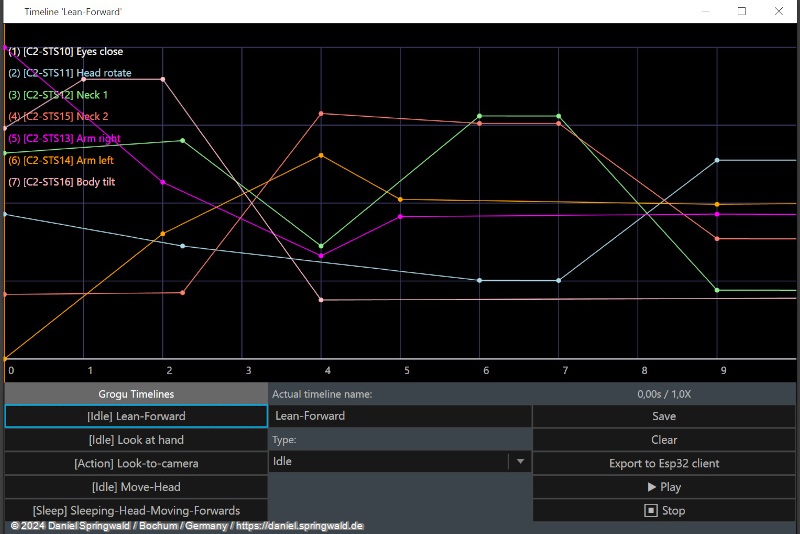
Structure of the Timeline Editor
The timeline editor consists of the following elements:
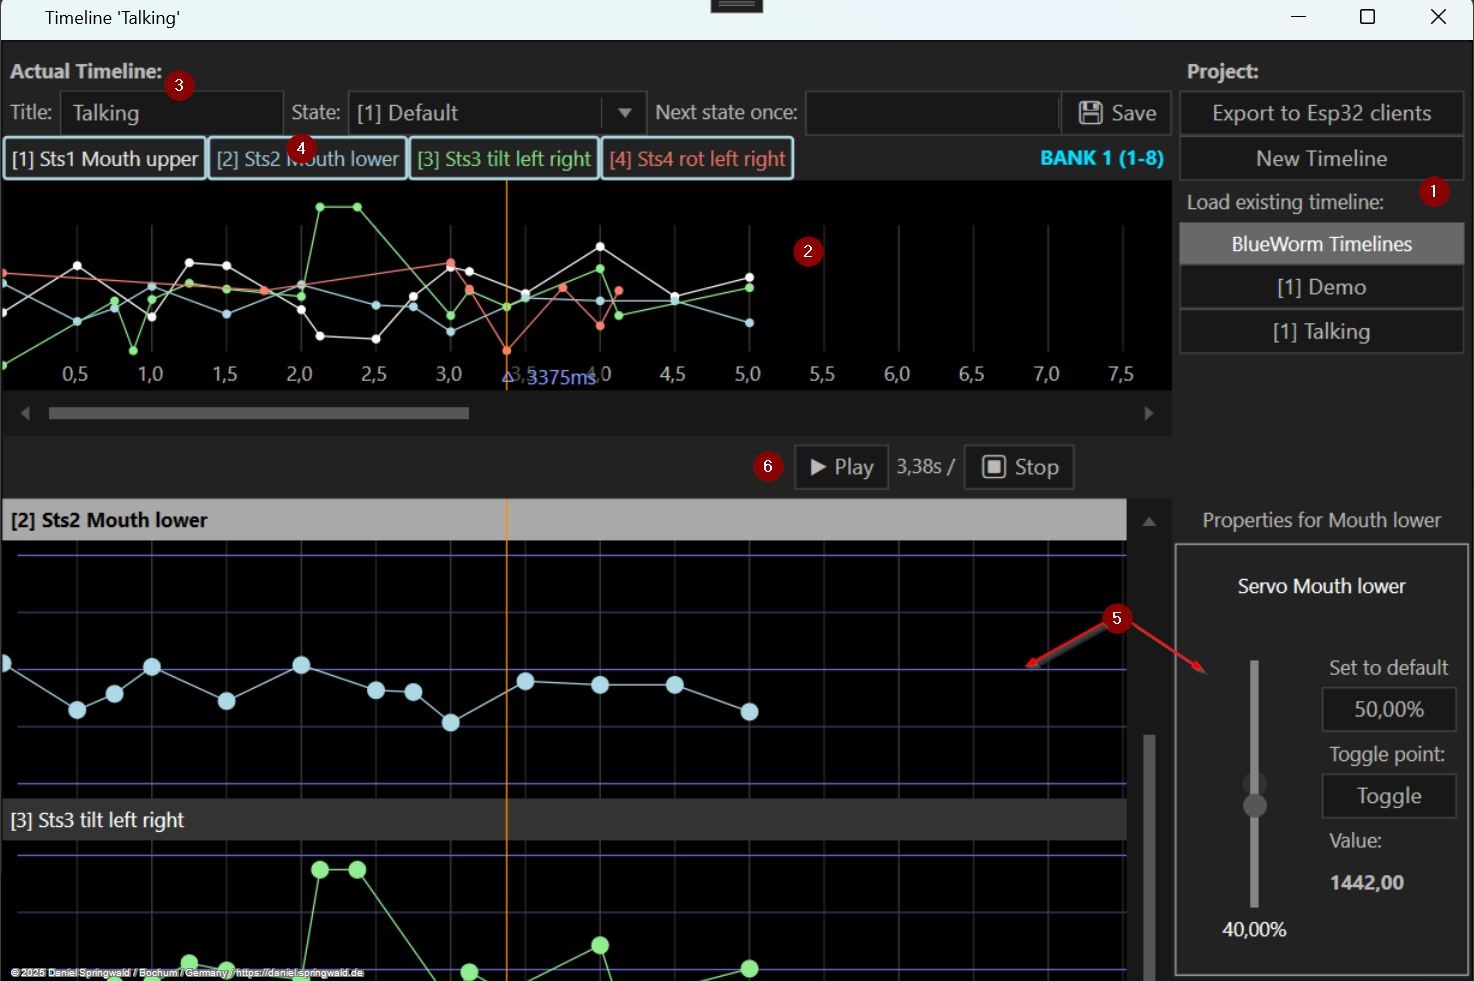
- Timeline List: Displays all timelines defined in the project.
- Overall View: The selected timeline with all actuators.
- Timeline Metadata: The metadata of the selected timeline.
- Actuator View: A list of all actuators that are included in the project.
- Keyframe Editor: For the selected actuator, edit state and keyframes.
- Play Control: Play or stop the timeline as a test.
Edit timelines
Similar to a video editing program, there is a timeline below the timeline in which the time is displayed in seconds. Keyframes can be set in the timeline that determine the state of an actuator at a certain point in time. In the case of a servo, the state can be the position, in the case of an LED, the color or brightness. Several keyframes of the same actuator in a row result in an animation and are displayed connected with lines.
Set keyframes
To set a keyframe, first select the desired actuator. This can be done by clicking on the list of actuators at the top of the timeline view. Alternatively, you can scroll through the individual actuator timelines below and select the timeline of the actuator. By clicking in the timeline, the time indicator is also set to the selected position.
Now you can set the state of the actuator on the right side of the keyframe editor. With a servo you can set the position by slider or by entering the value in the input field. With an MP3 player, you can select the audio file that is to be played at that time.
Nested Timelines
Nested timelines are timelines that can be used in other timelines. This makes it possible to repeat or combine animations without having to define them multiple times. To insert a nested timeline, select the first one at the bottom of each actuator timeline with the title "Nested timelines". Now you can select an existing timeline in the keyframe editor on the right, which will then be inserted at this point as a reference. Keyframes of a nested timeline are not displayed as a round dot in the timeline, but as a square to distinguish them in the timeline.
Insert sounds, speech, and music
Sounds, speech and music can also be inserted in the timeline. This requires an MP3 player actuator, which is defined in the project. When inserting a keyframe for the MP3 player, you can also specify whether an actuator should be moved synchronously with the sound. This can be helpful, for example, for a character who opens and closes his mouth in sync with speech.
Use the optional midi controller
Instead of keyboard and mouse, the timeline can also be operated with a midi controller. Then you can set the individual keyframes directly via the controller's controls and play the animations or the time via sliders.
The following midi controllers are currently supported:
- Behringer X-TOUCH MINI Midi USB Controller

Exporting Microcontroller Source Code
Let's continue with the Export of the project for ESP32 microcontrollers.